Front-End Web & Mobile
Building real-time apps with AWS AppSync Events’ WebSocket publishing
Real-time features have become essential in modern applications. Whether you’re building collaborative tools, live dashboards, or interactive games, users have come to expect instant and seamless updates as they interact with apps. AWS AppSync Events, a fully-managed service for serverless WebSocket APIs, has been helping developers add real-time capabilities to their applications, enabling them to build responsive and engaging experiences at scale.
Today, I’m excited to announce an enhancement to AWS AppSync Events: the ability to publish messages directly over WebSocket connections, in addition to publishing over the API’s HTTP endpoint. This update allows developers to use a single WebSocket connection for both publishing and receiving events, streamlining the development of real-time features and reducing implementation complexity. This is particularly beneficial for chatty applications that previously faced the overhead of establishing new HTTP connections for each message publication. Developers now have more flexibility: they can publish over HTTP endpoint, e.g.: for publishing from a backend, or publish over WebSocket which might be preferred for web and mobile application clients. In this post, I’ll go over the new enhancement, and show you how you can start integrating publishing over WebSocket in your apps.
Getting started
As I mentioned in my Announcing AWS AppSync Events post, getting started with AppSync Events is simple, and you can now publish over WebSocket or HTTP directly from the console. From the AppSync console, you can create an API and automatically get a default channel namespace along with an API key. on the Pub/Sub Editor, you can immediately try out your API. As shown in the image below, choose the “Publish” button, and in the dropdown, choose “WebSocket”. Your events are published over the WebSocket. You receive a publish_success message confirming the request.

Publishing over WebSocket in the AppSync’s console Pub/Sub editor
Message format
AppSync now supports a new “publish” WebSocket operation to publish events. After connecting to the WebSocket, your client can start publishing events to channels in configured channel namespaces. Note that you do not need to subscribe to a channel before publishing to it. To publish events, you simply create a data message, specify an id that uniquely identifies the message, the channel you are sending the message to, the list of events your are sending (up to 5), and the authorization headers to allow the request. You can find more information about the authorization headers format in the documentation. Each event in the events array must be a valid JSON string. Here’s an example.
After publishing, you receive a “publish_success” response with details on each event sent, or a “publish_error” response if the operation was not successful.
Integrate with your application
In the previous post, I showed you how to implement a simple client that uses the browser’s Web API WebSocket. I’ll do this again to connect and publish on an Event API WebSocket endpoint. In this example, I’ll build a real-time demo chat application where clients can send and receive messages instantly over WebSocket. Messages are published to the /default/messages channel, and clients subscribe to /default/* to receive all messages in the default namespace.
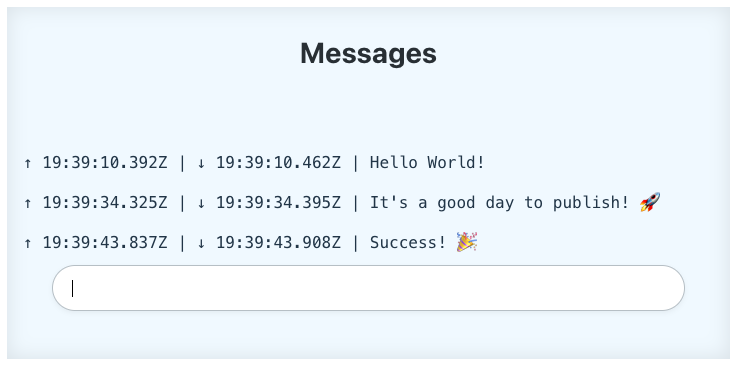
A demo chat application
I’ll use the new AWS Cloud Development Kit (CDK) L2 constructs for AppSync Events to configure and deploy an AppSync Event API, with a single channel namespace named “default”, and a single API key. Learn more about getting started with AWS CDK. If needed, use the Node Package Manager to install the CDK CLI.
I start by initializing a new folder structure and create my CDK application.
Next, I update the lib/cdk-events-publish-stack.js file with this code:
I then deploy the stack and save the output to a JSON file.
I get output that looks like this:
Next, I create the web app using vite (a frontend build tool), and vite’s vanilla javascript template. From the events-app folder, I run:
This creates a link to the output.json file that I can refer to in the app. In the new app folder, I replace src/main.js with the code below. Note that the code uses the CDK output in output.json.
Now in the app directory, I start the web server:
I can open the website at the provided address on multiple browsers to send and receive messages.
Cleaning up
When done with the example, I can remove the resources I deployed with CDK.
Conclusion
In this post, I went over the new Publish over WebSocket feature for AWS AppSync Events, and showed how to get started with the feature. This enhancement offers several benefits:
- Simplified implementation with a single connection for publishing and subscribing
- Reduced connection overhead for chatty applications
- Flexibility to choose between WebSocket and HTTP publishing based on your use case
Publishing over WebSocket is now available in all regions where AppSync is available. Clients can publish at a rate of 25 requests per second per client WebSocket connection. You can continue using your API’s HTTP endpoint to publish at higher rates (adjustable default of 10,000 events per second). Visit AppSync’s endpoints and quotas page for more details. We’re excited to see what you build with this new capability. Get started today by trying out the example in this post or by adding WebSocket publishing to your existing AppSync Events applications. To learn more about AppSync Events, visit the documentation.